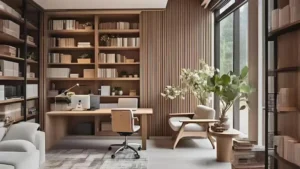
Selecting the perfect veneer can transform ordinary furniture into stunning statement pieces and elevate your interior design. But with countless wood species, grades, and application methods available, how do you choose the right veneer for your specific home decor project?
This comprehensive guide walks you through the key considerations—from aesthetic preferences to technical requirements—helping you make an informed decision that balances beauty, durability, and budget.
What Are the Different Types of Wood Veneer Available?
Understanding veneer categories helps narrow your options based on project needs.
Veneer Classification Breakdown
1. Raw Wood Veneer
- Description: Unbacked, natural wood slices (0.6mm-1.5mm thick)
- Best For: Professional applications, curved surfaces
- Pros: Most authentic look, can be sanded/stained
- Cons: Requires skill to apply, needs sealing
2. Paper-Backed Veneer
- Description: Thin wood layer bonded to paper (0.3mm-0.6mm)
- Best For: DIY projects, flat surfaces
- Pros: Easy to handle, affordable, stable
- Cons: Limited sanding, fewer wood options
3. Phenolic-Backed Veneer
- Description: Wood layer with waterproof phenolic resin (0.6mm-1.2mm)
- Best For: High-moisture areas, commercial use
- Pros: Extremely durable, moisture resistant
- Cons: Higher cost, limited flexibility
4. Reconstituted Veneer
- Description: Engineered from real wood fibers
- Best For: Consistent patterns, modern looks
- Pros: Uniform appearance, sustainable
- Cons: Lacks natural grain variation
5. Peel-and-Stick Veneer
- Description: Pre-adhesive backed veneer strips
- Best For: Quick upgrades, small repairs
- Pros: No glue needed, user-friendly
- Cons: Not permanent, limited durability
Veneer Type Comparison Table:
| Type | Thickness | DIY-Friendly | Best Application |
|---|---|---|---|
| Raw | 0.6-1.5mm | ❌ | Fine furniture |
| Paper-backed | 0.3-0.6mm | ✅ | Cabinets, panels |
| Phenolic | 0.6-1.2mm | ⚠️ | Bathrooms, kitchens |
| Reconstituted | 0.5-1.0mm | ✅ | Modern decor |
| Peel-and-stick | 0.5-1.0mm | ✅ | Temporary fixes |
Pro Tip: “For first-time veneer users, paper-backed veneer offers the perfect balance of manageability and professional results.” – Sarah Robinson, Fine Woodworking
How to Match Veneer to Your Existing Decor Style?
Select veneers that complement your interior design aesthetic seamlessly.
Veneer Selection by Design Style
Traditional/Classic Styles
- Recommended Veneers: Cherry, Mahogany, Walnut
- Characteristics: Rich, warm tones; figured grains
- Best Uses: Formal furniture, wall paneling
- Finish Tip: Glossy lacquers enhance depth
Modern/Contemporary Styles
- Recommended Veneers: Maple, Ash, Wenge
- Characteristics: Straight grains, uniform coloring
- Best Uses: Sleek cabinetry, geometric designs
- Finish Tip: Matte finishes for subtle elegance
Rustic/Farmhouse Styles
- Recommended Veneers: Oak, Chestnut, Reclaimed Woods
- Characteristics: Prominent grain patterns, knots
- Best Uses: Feature walls, distressed furniture
- Finish Tip: Wire-brushed textures add authenticity
Industrial Styles
- Recommended Veneers: Teak, Iroko, Eucalyptus
- Characteristics: Medium to dark tones, rugged look
- Best Uses: Accent pieces, mixed-material furniture
- Finish Tip: Oil finishes highlight natural texture
Coastal/Scandinavian Styles
- Recommended Veneers: Birch, Pine, White Oak
- Characteristics: Light, airy appearance
- Best Uses: Built-ins, ceiling applications
- Finish Tip: Whitewashed or limed treatments
Wood Species Color Guide:
| Light Tones | Medium Tones | Dark Tones | Exotic Options |
|---|---|---|---|
| Maple | Cherry | Walnut | Zebrawood |
| Birch | Ash | Mahogany | Bubinga |
| Pine | Hickory | Wenge | Padauk |
| White Oak | Sapele | Ebony | Purpleheart |
Designer Insight: “View large veneer samples in your actual space at different times of day. Lighting dramatically affects how wood tones appear in your decor.” – Emily Henderson, HGTV Host
What Technical Factors Should You Consider When Choosing Veneer?
Beyond aesthetics, practical considerations ensure long-term satisfaction.
Durability and Performance Characteristics
1. Moisture Resistance
- High Humidity Areas: Teak, Iroko (phenolic-backed)
- Dry Environments: Most domestic hardwoods
- Avoid in Bathrooms: Porous species like oak
2. Wear Resistance
- High Traffic: Maple, Hickory (Janka 1450+)
- Light Use: Walnut, Cherry (Janka 1000-1300)
- Delicate: Mahogany, Pine (Janka <1000)
3. Stability
- Least Movement: Quarter-sawn veneers
- Most Stable: Rotated/reconstituted grains
- Avoid: Flat-sawn for large surfaces
4. Flexibility Needs
- Curved Surfaces: Raw veneer (0.6mm)
- Flat Panels: Backed veneers
- Complex Shapes: Peel-and-stick options
5. Maintenance Requirements
- Low Maintenance: Factory-finished veneers
- High Maintenance: Unfinished raw veneer
- Easy Repair: Medium-toned woods
Veneer Grade System:
| Grade | Characteristics | Best USE |
|---|---|---|
| Premium | Perfect face, consistent color | Visible furniture surfaces |
| Good | Minor color variations | Cabinetry, built-ins |
| Sound | Some defects, repaired knots | Backs, hidden surfaces |
| Utility | Prominent features, rustic look | Accent walls, crafts |
Technical Tip: “Check the veneer’s ‘flitch’ (original log position) when ordering multiple sheets. Sequential leaves from the same flitch ensure perfect grain matching.” – Thomas Johnson, Furniture Conservator
How Does Veneer Cutting Method Affect Your Project?
The slicing technique impacts grain pattern and application suitability.
Veneer Production Methods Compared
1. Rotary Cut
- Process: Log spun against blade (like unrolling paper)
- Appearance: Bold, varied grain patterns
- Best For: Plywood cores, curved surfaces
- Stability: Less dimensionally stable
- Cost: Most economical
2. Plain Sliced (Flat Cut)
- Process: Log sliced parallel to growth rings
- Appearance: Classic cathedral grain patterns
- Best For: Traditional furniture, wall panels
- Stability: Moderate movement
- Cost: Mid-range pricing
3. Quarter Sliced
- Process: Log quartered before slicing perpendicular to rings
- Appearance: Straight grain with occasional flecks
- Best For: Formal spaces, geometric designs
- Stability: Most dimensionally stable
- Cost: Premium priced
4. Rift Cut
- Process: Diagonal cut between quarter and plain
- Appearance: Linear grain with minimal pattern
- Best For: Modern aesthetics, long runs
- Stability: Excellent for large surfaces
- Cost: Highest price point
Cut Method Selection Guide:
| Project Type | Recommended Cut | Why? |
|---|---|---|
| Antique reproduction | Plain sliced | Authentic period look |
| Contemporary cabinet | Quarter sliced | Clean lines |
| Curved furniture | Rotary cut | Maximum flexibility |
| Long wall panels | Rift cut | Minimal expansion |
| Budget projects | Rotary cut | Lower cost |
Industry Insight: “Quartered white oak veneer became iconic in Mission-style furniture because of its stunning ray fleck patterns when quartersawn.” – Gustav Stickley Museum
What Are the Best Veneer Options for DIY vs Professional Projects?
Skill level should guide your veneer selection process.
Project Difficulty Matrix

Beginner-Friendly Options:
Peel-and-Stick Veneer Tape
- Ease: Simplest application
- Tools Needed: Utility knife, roller
- Best For: Edge banding, small repairs
- Limitations: Narrow widths only
Paper-Backed Veneer Sheets
- Ease: Manageable for novices
- Tools Needed: Contact cement, roller
- Best For: Cabinet refacing, tabletops
- Limitations: Flat surfaces only
Pre-Finished Veneer Panels
- Ease: Ready-to-install
- Tools Needed: Saw, adhesive
- Best For: Wall coverings, wainscoting
- Limitations: Limited customization
Advanced/Professional Options:
Raw Wood Veneer
- Skill Level: Expert
- Tools Needed: Vacuum press, specialized glue
- Best For: High-end furniture, curves
- Advantages: Unlimited finishing options
Book-Matched Veneer Sets
- Skill Level: Professional
- Tools Needed: Precision cutting equipment
- Best For: Statement pieces, luxury interiors
- Advantages: Dramatic symmetrical patterns
Marquetry Veneer Kits
- Skill Level: Artisan
- Tools Needed: Scroll saw, veneer saw
- Best For: Decorative inlays, art pieces
- Advantages: Unlimited creative potential
Tool Checklist by Project Level:
| DIY Projects | Professional Projects |
|---|---|
| Utility knife | Veneer saw |
| J-roller | Veneer softener |
| Contact cement | Cold press/vacuum bag |
| Clamps | Shooting board |
| Sanding block | Cabinet scraper |
| Edge trimmer | Frenchman’s roller |
Workshop Wisdom: “Start with paper-backed veneer on scrap wood to practice cutting and adhering techniques before committing to your actual project.” – Bob Flexner, Understanding Wood Finishing
How to Budget for Your Veneer Project?
Understanding cost factors helps allocate funds appropriately.
Veneer Pricing Breakdown
Cost Factors:
Wood Species
- Domestic (Oak, Maple): $2-$8/sqft
- Imported (Mahogany, Teak): $5-$15/sqft
- Exotic (Ebony, Zebrawood): $15-$50+/sqft
Veneer Type
- Raw: $3-$20/sqft
- Paper-backed: $2-$10/sqft
- Phenolic: $8-$25/sqft
- Peel-and-stick: $1-$5/linear foot
Grade Quality
- Premium: +30-50% over standard
- Architectural grade: +100-200%
- Utility grade: 50-70% discount
Cut Method
- Rotary: Least expensive
- Plain sliced: +20-30%
- Quarter/Rift: +50-100%
Budget Planning Tips:
- Order 20% extra for waste/mistakes
- Consider veneer-matching services for large projects
- Buy full flitches when possible for consistency
- Check remnant bins for small project savings
- Domestic species offer best value
Cost-Saving Strategies:
- Use premium veneer only on visible surfaces
- Combine with paint or other materials
- Choose rotary-cut over quarter-sawn
- Purchase from veneer specialists vs. retailers
- Time purchases with seasonal sales
Price Comparison Table:
| Veneer Type | Low End | Mid Range | High End |
|---|---|---|---|
| Oak | $2.50/sqft | $4.50/sqft | $7.00/sqft |
| Walnut | $4.00/sqft | $7.00/sqft | $12.00/sqft |
| Mahogany | $5.00/sqft | $9.00/sqft | $18.00/sqft |
| Ebony | $18.00/sqft | $30.00/sqft | $60.00/sqft |
| Exotic Pack | $15.00/sqft | $25.00/sqft | $45.00/sqft |
Financial Tip: “For furniture projects, remember that veneer represents only 20-30% of total costs—factor in adhesives, tools, finishes, and labor.” – Fine Woodworking Magazine
Conclusion: Selecting Your Perfect Veneer
Choosing the right veneer involves balancing aesthetic preferences, technical requirements, skill level, and budget. Whether you’re refinishing a vintage dresser or creating custom wall paneling, the perfect veneer exists for your project.
Final Selection Checklist:
- Match to Decor Style: Traditional, modern, rustic?
- Consider Usage Conditions: Moisture, wear, sunlight?
- Evaluate Skill Level: DIY-friendly or professional?
- Review Cutting Method: Need specific grain pattern?
- Calculate Budget: Premium surfaces only?
- Source Samples: View in your actual space
- Plan Installation: Appropriate tools/adhesives?
Top Recommendations by Project:
- Beginner Furniture Makeover: Paper-backed cherry veneer
- Kitchen Cabinet Refresh: Phenolic-backed maple veneer
- Feature Wall: Book-matched walnut veneer panels
- Art Deco Restoration: Macassar ebony veneer
- Budget-Friendly Update: Peel-and-stick oak edge banding
Remember that quality veneer properly applied can last decades, making it worth careful selection. When in doubt, consult with veneer specialists who can provide technical guidance specific to your project parameters.


